Mac OS X FileVault Review – Encrypting files and folders
Notes & Warnings
Ability
If FileVault is enabled on an account, access to that account’s Public folder and Sites folder will not be available to anyone else, regardless if the user is logged in or not. So, if that user wishes to serve a website out of the Sites folder in their home folder, activating FileVault is would not be a viable option for him or her.
Stability
There have been several reports of people losing data with FileVault and various related errata under Mac OS X v10.3.0, but the 10.3.1 update along with other subsequent updates from Apple should have fixed these problems. However, the update documentation still mentions the potential for data loss, when using FileVault, if the computer is force-restarted or power is lost while disk space is being reclaimed.
Security
Enabling FileVault will leave the home folder’s data (last modification immediately preceding the FileVault encryption process) in an unencrypted state in the free space of its belonging hard disk. SecureMac has posted the advisory on this matter.
Furthermore, another recovery option, besides the master password, is to audit that user’s password from the shadow password file in order to recover it. With that said, in its current state, FileVault is not for serious security.
Overview
Sparse Disk Image
At its core, FileVault uses an AES-128 encrypted sparse disk image, internally formatted with HFS+ Journaled, to store the user’s home directory. Some key points of the disk image are listed below:
The sparse disk image format (.sparseimage) differs from that of regular, fixed-size disk images (.dmg) in that it adjusts its size on the physical disk as necessary to accommodate room for new data.
Adopted by the National Institute of Standards and Technology (NIST), the Advanced Encryption Standard (AES) is based from a symmetric block cipher developed by Dr. Daemen and Dr. Vincent which was named the Rijndael algorithm. Although other data block sizes could be handled by Rijndael, only the 128 bit block was adopted in this standard. And as for key sizes, Apple uses the 128-bit key length of AES for FileVault.
The sparse disk image resides at /Users/<username>/<username>.sparseimage when the user is not logged in. When the respective user is logged in, the image itself resides in a similar path, except with the user folder having a period (.) in front of it to allow the image to be mounted in a path to similar to any other regular home directory (e.g. /Users/<username>/).
To just mount the sparse disk image as a normal volume, one can use hdiutil mount /Users/<username>/<username>.sparseimage from the command line (and utilizing -stdinpass to avoid the graphical interface for entering the password). (See the man page on hdiutil for more information on its use.)
Master Password
In the advent that a user forgets his or her account password (and, in turn, the password to the encrypted disk image), the user has a “safety net” password known as the “master password” which allows the user to unlock any FileVault account on the respective computer. The master password information resides in /Library/Keychains/.
How-To
Turning FileVault On
Note: No other users may be logged in when turning FileVault on. If they are, they must first log out or have an administrator log them out.
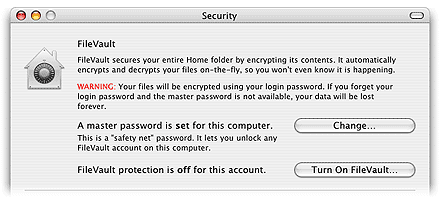
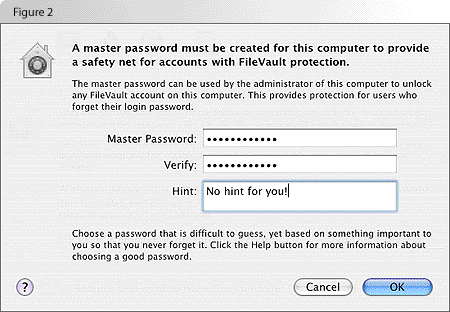
Open up System Preferences (available from the Apple menu) and select the Security preference pane. Under the Security preference pane, press the “Set Master Password…” button (figure 1) to set a master password (figure 2), if a master password is not already set. If the preference pane is locked for further changes, you will be prompted to enter in an administrative password before proceeding further. Also, if you do not set a master password beforehand and just press “Turn On FileVault…”, you will prompted to set a master password first.

After setting the master password, you may turn on FileVault for your account. To do so, push the “Turn On FileVault…” button. (figure 3)

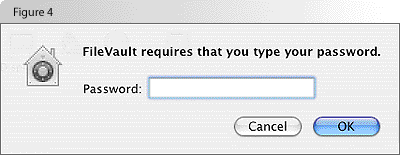
Then enter in your user account password (figure 4) and press “OK”.
An informational dialog sheet will pop down. Press the “Turn On FileVault” button. (figure 5)
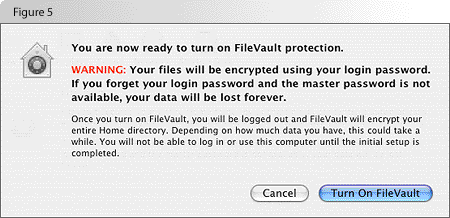
You will be logged out and your home directory will be copied over to an encrypted disk image. (Note: FileVault does not securely erase the initial home folder, so any data contained in the home folder before activating FileVault will be left behind, available for possible recovery, in the free space of the hard disk.)
 When you log back in, your home folder icon will be changed to a metal vault home with a large combination lock depicted on the front.
You have successfully enabled FileVault!
Turning FileVault Off
Note: No other users may be logged in when turning FileVault off. If they are, they must first log out or have an administrator log them out.
Open up System Preferences (available from the Apple menu in the upper left-hand corner) and proceed to choose the Security preference pane. If FileVault is activated on your account, a button should be available entitled “Turn Off FileVault…” in the same location where the “Turn On FileVault…” button was located (figure 1). Press that button. If the preference pane was locked, an authentication dialog box will appear requesting administrator user name and password will be displayed; administrative authentication will be required before proceeding further.
After that is dealt with, type in your account’s password and press the “OK” button. (figure 6)
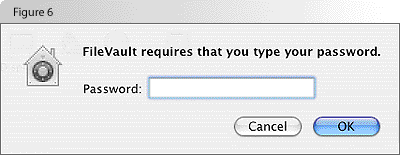
You will be prompted once more (figure 7) to verify that you indeed want to turn off the use of FileVault on your account. Press the “Turn Off FileVault” button to do so.
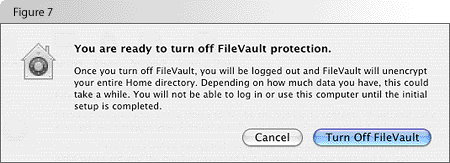
From there, you will be automatically logged out, your home folder will be decrypted, and the process of disabling FileVault on your account will be complete.
